
Welcome to bonus stage! Today, we will be playing one mission of Advance Wars 2, in order to show off a small segment of the game that I love without committing to going through the whole thing. AW2 isn't long, and it's an incredibly strong game from a writing standpoint, but it's much more heavily focused on character and not on plot. I would recommend playing it- although there is a remake coming out in the near future (well, hopefully).

I won't go into much detail about the nature of level selection and what information this screen is sharing with the player, since it's not particularly relevant on this micro level, but this screen is the only way to tell what mission you've selected ahead of time (you may choose which levels you want to play semi-freely in this campaign).
Before we begin, a plot summary of Advance Wars 2: Black Hole is invading Wars World, and the four countries must chase them away. We will be in Yellow Comet for this mission- the other countries are Orange Star, Blue Moon, and Green Earth.

Missions usually begin with the villains discussing their plans. This is a faceless Black Hole soldier, as weird as his sprite might be.


And this is Adder, a moderately high-ranked member of the Black Hole army. He's only said two words and I expect you've gathered a great deal of his personality from his appearance alone. This is a pretty good mission for showing off what Adder is like as a character, but he'll need to say more than "Very well" for that.

This is Flak, the lowest-ranked Black Hole CO and the dumbest character in the trilogy. Although saying that, he's not actually as dumb as he is portrayed- he's certainly a bit of an idiot, but he's clearly got some braincells to rub together here, and AW1 has some true dunderheads running around...
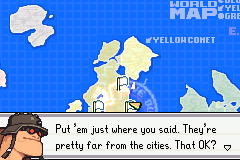
Narrative-wise, Adder has mounted a laser cannon of some description, and he expects Yellow Comet to come marching in to get hit by it.
Flak doesn't see any reason for Yellow Comet to swallow the bait.
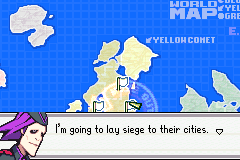

That's certainly an effective bait. Although I wonder whom "the world" is. At this point in the story, the other three known nations are Orange Star (which can and has freely lent aid to repel Black Hole from Yellow Comet by this point), Blue Moon and Green Earth (who are both in the middle of repelling Black Hole invasions of their own). None of these countries are going to think less of Yellow Comet for allowing cities to be taken over.
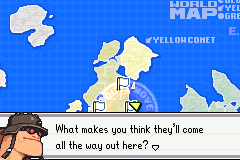
I mean... it's not like you're unfamiliar with the taste of defeat.

Flak seems just as unconvinced. He was in charge of the Orange Star invasion, and to have access to this mission, he has to have lost at the last line of defence.

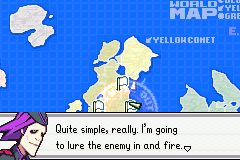
More Flak intelligence, he doesn't really understand the tactical benefit of putting his conquering force further than necessary from the place to be conquered. He obediently does as Adder requests, of course.

Adder wants the soldiers to be invading slowly.

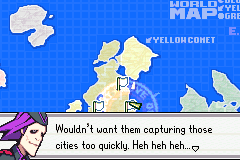
...Because he plans to taunt us. We'll show him the foolhardiness of his ways.

The mission number is entirely meaningless, it is dynamically generated based on the number of missions you have completed beforehand. In Normal Mode (which is what I'm playing, I didn't have save data for Hard, and the gameplay is relatively tangential), I believe this can be anywhere between Mission 11 and Mission 23.

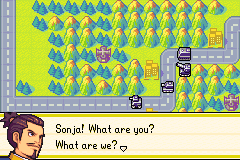
This is Sonja, Yellow Comet's tactician and Kanbei's daughter. This technically makes her Princess of Yellow Comet, but at no point is she addressed as such or does she dress the part.

And this is Emperor Kanbei, the most powerful CO in all the land. He's also a bit of an idiot. In AW1, it's possible that he is incapable of dressing himself, but he got much smarter for AW2 (although he is introduced having misplaced his socks).
I have no evidence for or against the theory, but there's a non-zero chance Kanbei isn't actually an Emperor and just dresses like a samurai Just Cause. Either way, he's basically the same character.

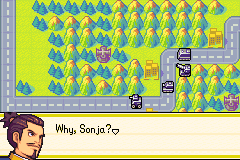
Sonja is hypercompetent and has already figured out what Black Hole is doing here.

Although she doesn't know why yet.

Kanbei is impatient and ready to get into fights. This is the "brand" of stupidity Kanbei works with.
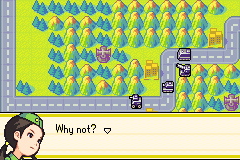

Sonja, rather coldly, has noticed that there's no real reason we need to be defending this position. The idea of having Yellow Comet's reputation suffer as a result doesn't occur to her, which is more evidence in favour of this not meaning anything.
Kanbei takes offence to Sonja's conclusion.


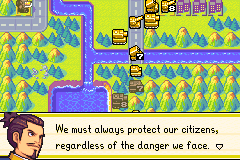
He will save the lives of the people that Black Hole has endangered.

No matter the cost.

Sonja is taken aback. Kanbei even presenting an argument against Sonja's advice on military matters is unusual, let alone winning one.

I mean, the man's got a point. "Protecting the people of Yellow Comet" includes these guys.


Sonja is happy to defer to Kanbei's judgement. Kanbei, of course, can back up his boasts with results.

Sonja specialises in gathering intel, and she's very good at figuring out what Black Hole is up to before it happens.
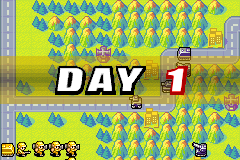
And so the gameplay begins. Advance Wars battles happen over the course of Days (well, weeks, most of the time) and each turn is definitively a Day. Well, until AWDS cast doubt on that.
Advance Wars is also a bit unique in that missions do not have any sort of unique music. Every CO has their own dedicated theme music, and that is the song that plays on their turn, regardless of whether they're a player or an enemy faction. Since we're playing as Kanbei, we get this song when it's our turn.

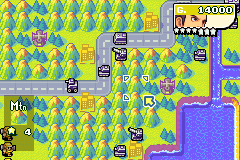
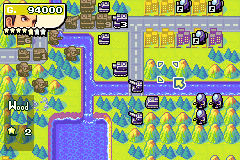
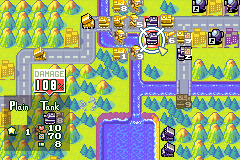
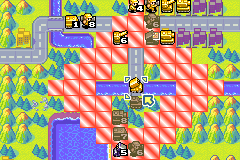
This is the map of the battlefield. Terrain is king, but this map is fairly unhelpful when it comes to some of the most important information an Advance Wars player needs. It's not like the equivalents in FE were much better.

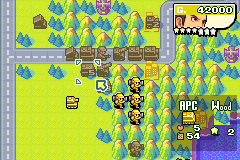
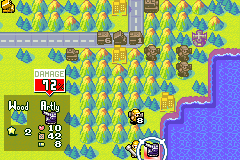
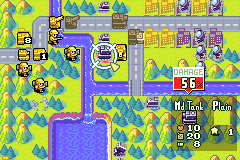
This is our starting army. This mission is "predeployed", so these are the only soldiers we will ever get. We have, in total:
- Two infantry: Cheap, disposable, and essential to victory. Although perhaps these guys aren't "disposable".
- Three mechs: For when you want your infantry to pack more of a punch. Can't march as far, though, although they're better at crossing mountains.
- Two APCs: These can resupply ammunition and fuel of any adjacent units, and will do so actively at the start of every turn. They can also carry footsoldiers (infantry and mech)- loading is an action done by the footsoldier, which means you can load, move, and unload in a single day.
- Two artillery (arty): These batteries fire a powerful shell 2-3 squares away. Indirect combat units like artillery cannot move and Fire on the same day.
- Two light tanks: The backbone of any army, these units can move a solid distance over most terrains, hit many targets decently hard once they arrive, and are in general the sort of unit you want to balance cost and power.
- Three medium tanks (middie): These things hit much harder, but can't move as quickly. The presence of a middie in an area requires active forethought to take down.
- Two rocket trucks: A more powerful arty, rockets can shoot 3-5 squares away and do more damage than artillery, but in addition to lower Move, they also have tyres, which means they can't cross terrains as easily as the treaded tanks and arties.
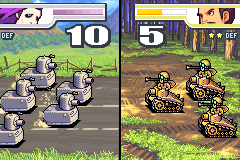
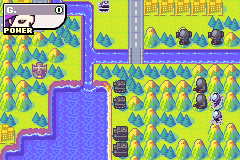
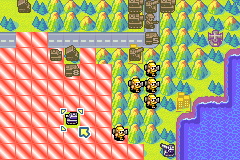
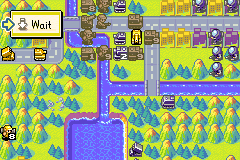
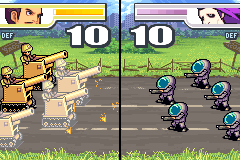
Here is the initial enemy force. Nothing particularly intimidating here (although I'm not sure what Adder plans to do with that APC), although we see a unit not represented in the player army today: that is a recon, a tyred unit that can move incredibly quickly, but they're not much good at harassing anything but infantry. They have high Vision in Fog of War and harassing infantry is an important part of the game, but in this mission, neither of these are a factor.

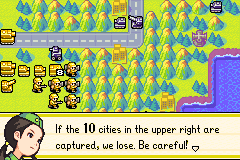
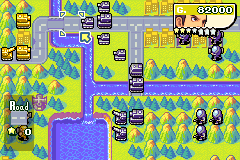
Up here, we can see the ten cities that are being attacked by Black Hole. We lose if Adder Captures all ten. We can allow some of them to be captured, and in fact I believe it's not possible to stop all of them from being captured.

Here's the main body of Adder's army- as mentioned in the opening of the battle, they're stationed a considerable distance from the cities they are meant to be conquering. The infantry and mechs are the only units able to Capture those cities, and they will "slowly" make their way north to do so while we have no means of putting a stop to them. Because Adder is in charge of the enemy army, "slowly" is a debatable point, but we can handle that.

In the options menu is the ability to read our bio. The important information in this screen are those stars underneath Kanbei's portrait, but this is also a good place for lore and brushing up on each CO's skills.
The Hit and Miss are usually pretty funny more than they are illuminating. The final boss's Hit is "Invasions" and his Miss is "Peace", for crying out loud. Kanbei disliking computers is pretty amusing, though.

Kanbei's units have 130% of the offence and defence of a "vanilla" unit in this game (in AW1 and DS, it is 120%). When deployed from bases, they also have 120% of the price tag. I believe at some point, this is justified in the lore by Kanbei training elite soldiers with correspondingly higher wages. In a predeployed map like this one, this "weakness" of Kanbei's does not apply.

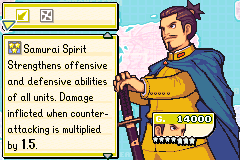
When enough of those stars are filled (they fill when damage is dealt and fill more rapidly when damage is taken), COs can fire off CO Powers somehow. These are Kanbei's: Morale Boost raises his attack to 150% of vanilla, and Samurai Spirit also gives him 160% defences (all CO Powers give a +10% defence boost no matter what they're supposed to do- that 160% figure is from after that bonus). You do not attack Kanbei with Samurai Spirit. The counter-attack thing is just icing on the cake.

And here's Adder's bio. Considering some of the things that come out of Flak's mouth when he's not busy being a tutorial enemy CO, I wouldn't say it's a stretch to call Adder the least skilled Black Hole CO narratively. I'm surprised he hates dirty things, though.

This is not actually reflected in the gameplay, Adder's CO Power Stars fill at the same speed as everyone else's. He just has the least of all characters in the game as his personal gimmick.


His powers are fairly uninteresting, but you'd be surprised just how often those extra squares of movement either surprise you when you're not expecting it or impede your progress when you are. "Movement is King" in Fire Emblem, and while that's less true in Advance Wars, territorial control is King here and being able to Move unpredictably makes you good at that.

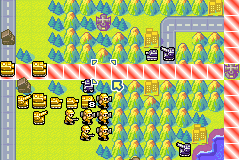
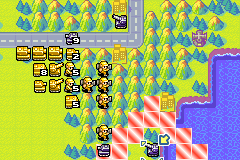
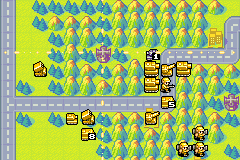
Turn 1 starts by advancing haphazardly. Pictured here are some Mechs that got moved around by the power of APC movement, and also just how much simple Plains tiles (the green stuff) hampers the tyred rockets. Literally no other movement type is impeded by Plains.

One thing that happens in Advance Wars but not in Fire Emblem is that your turn does not automatically end when all units have exhausted their movement. In most maps, this is usually because this is the part of your turn where you buy new units to resupply your forces. You have the option of doing this whenever, but it just usually happens at the end of the turn as a matter of convenience. You actually have the option of doing this in Fire Emblem, too (it should be under "Auto-End Turns"), but there's very few advantages to doing it other than savescumming in games where it's possible.

Adder's theme. The Black Hole COs have themes that very much sound like Enemy Phase themes, but as mentioned, they retain this if you choose to play as them in the game's non-Campaign missions or multiplayer.
Our first combat of the mission, Adder sends his recon against my APC. In the battle animations, one can observe that each faction has unique designs for almost every type of unit. Black Hole uses futuristic, alien technology, Yellow Comet makes do with Japanese stuff from the World War II era. There aren't any in this mission, but their Battle Copters are the second-most hilarious unit in the game. The most hilarious are a unit we do have and will get the chance to show properly.


Adder's south-east division advances slowly but surely. Treaded units cannot cross mountains at all, so both them and the tyred rockets will go around through the forests to get to that bridge and reach us. Footsoldiers can cross rivers, so those guys can go more directly.


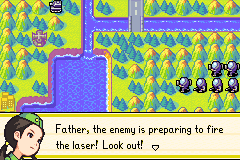
Sonja has found out about the laser cannon. And just in time, too!
Any unit caught in its path is not killed- in fact, laser cannons (like all Black Hole structures) can't kill units no matter what.


Kanbei may be prepared to tackle the trap by the horns, but he should still let Sonja finish. I don't suppose she paused for breath or anything?


This is the first appearance of laser cannons in Normal Mode, and as such they can't be fired every Day, like every other laser cannon in the campaign. Hard Mode adds lasers to earlier maps, but doesn't power up these ones.
All the better for it, because this map really does kinda need the lasers firing every other turn to be fair for us. Although I'd be interested to see someone hack the game to make these lasers fire every day and then beat the map under that constraint.

Kanbei is sure to thank Sonja whenever she does a good thing. Which is most of the time, but never let it be said he takes her for granted.

Sonja, meanwhile is just doing her job.

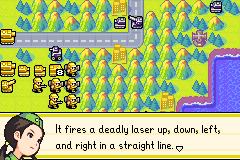
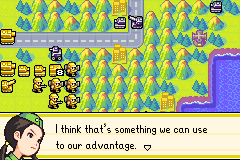
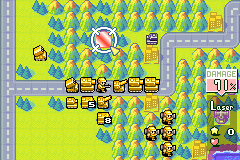
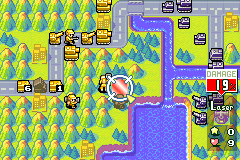
So yeah, we should endeavour to not be standing in the laser's path today. I don't think this rocket is happy parking here anyway, it's still too far away from the cannon.
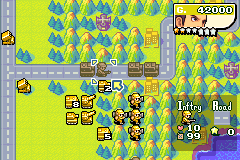
The firing arc of this laser covers the whole road between these two mountains, which is why this map would be so terrifying with lasers that fire every day. I need the off day to push through the valleys.


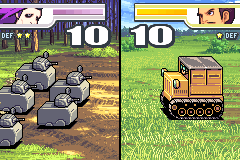
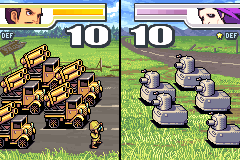
Our first firing action, and we completely annihilate this Recon. This would be around the point I mention how HP and Luck works (you do the number of HP that is the tens digit, with a chance of landing a bonus point of damage based on the ones digit), but this isn't a very practical example, since Adder has been deleted.

The four Mechs up here cross into the mountains, with the goal of attacking that laser cannon and those two enemies in the south (attacking the two northern enemies if the opportunity occurs). We can also see me start to make a foolish mistake.
I forgot about this laser cannon's southward arc. At least none of these units are Important ones.
The laser fires at the beginning of Adder's turn.

Sorry!

This laser missed. I wish they wouldn't fire if they miss. Especially later on, when there's a map with four lasers that fire daily.

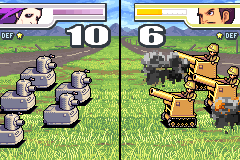
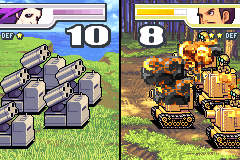
This is the before and after of this tank's encounter. I was not expecting it to survive. I underestimated Kanbei's Kanbeiness.

This front continues to be a complicated knot for Adder. The laser actually works on himself, so those footsoliders do have cause for alarm.

Hee hee, perfect.

And we get the lucky hit. The long story of Luck is that all units have 100 HP and the % shown is the total HP you will deal, +0-9 points (although some COs will alter this range), and the game will remember the 100 point number, even if it does critical calculations with the 10 point number. When you hit a damaged unit again, you're more likely to get a lucky hit because it's probably slightly less than printed. In unusual circumstances, you can even deal 2 more damage than entitled!
Practically speaking, we can also notice that the high Defence of the mountain has shielded Kanbei from printed damage, although his HP bar has visibly decreased from the machine gun fire nonetheless. Damage dealt is calculated with respect to the amount of HP you have, with a damaged unit doing less damage. In combat like this, where an attacker attacks and the defender counterattacks, the defender's HP is considered to be what it was after the attacker lands their hit: whoever lands the first strike has the upper hand.

Of course, this is all academic for this guy, who will be dealing no damage in return.

Artillery cannot counter a melee strike. They can't counter indirect fire either, come to think of it, which makes indirect vs indirect battles an exercise in stalemating each other.

The two 5 HP infantry show off a defensive mechanic in this game, Joining. Two units can join into one with the combined total of their HP values (if this is greater than 10, the remaining HP is converted into Funds scaled to the Value of the unit). This will give us a 10HP Infantry- Infantry have relatively little use on this map, and 5HP Infantry have even less.

This tank flies ahead to rest on this city to heal.
...Your sacrifice will be remembered, light tank. Never mind that both of your moves this match were my foolishness.
I don't join the APCs. A 1HP APC is as useful as a 10HP one (except defensively), and I think the value of having 2 damaged APCs outweighs the defensive advantages of having 1 10HP one on this map.

Adder has taken enough of a beating to charge Sideslip, and decides to use it. If a CO Power is used, the theme changes to a special CO Power theme for the rest of the day- and Black Hole COs get different ones to the other nations. This is based on the CO and not player/enemy- if you're playing as these COs, you get their CO themes as well as their day-to-day ones.

Yeah, that tank was a goner no matter where I put it. Unless I put it on that city south of the laser path- that was the smart move.
Sideslip also increases the movement range of these footsoldiers. Told you they wouldn't be going "slowly".
I object to this laser cannon, but I can't smash it this turn. Maybe if I put an arty on the space my infantry is standing on this turn, but that would open it up to the other laser and I would deem an arty just important enough to prefer to avoid that outcome.

The 10% bulk bonus of a CO Power, and the terrain bonus of the Plain he's standing on, means my middie no longer oneshots his tank.

Ah well, a 1HP tank is pretty pathetic. Pathetic enough I will expose my arty to it.

The 5HP APC is in the laser's path again. This rocket, though, is too valuable for that.
This tank can't get anywhere this turn, so stays put.
I had forgotten about this tank, but this guy doesn't seem like he's getting anywhere interesting.

The only possible victory condition of this map is Rout, so this arty has to be destroyed at some point. One of the mechs heads south to help the south mech accomplish that.
Black Hole units can be damaged by laser fire- or maybe that's just these lasers. Whatever's the case, that tank was already on 1 printed HP, so it seems just fine. Under the hood, if a Black Hole structure should kill you but doesn't, it reduces you to 1/100 HP, whatever your under-the-hood HP was at beforehand.

Arties are powerful. When they're not shooting at Kanbei mechs on mountains, anyway.

Told you this arty wasn't in any danger.

Sure, whatever.

And these guys have started capturing the 10 cities. To Capture a city, a footsoldier must stand on it and Capture it (this is an action they must take instead of Attacking or Waiting). A unit Captures as much as its printed HP, and when the property's HP is reduced from 20 to 0, it changes allegiance.
Short version, those guys can turn a yellow property black in 2 turns unless we start damaging them.

When I said "any unit can finish off a 1/100 HP unit", I meant it.
I don't think the laser is firing today, this is just the best I could move these units. I call this a chokepoint?
This tank makes sure to finish this guy off before moving on, since otherwise he'll get into real trouble.

There goes that guy. These mechs probably aren't doing anything else this mission.

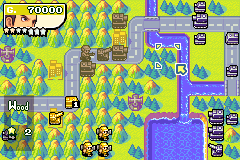
The north rocket smashes this laser. Now it won't be firing on any day. I don't really think you have an option but to smash this one at some point, that valley to its east is too important.

Two down, eight to go.
...Adder, you were supposed to capitalise on my terrible chokepoint.
Ah well, a rocket and two Mechs later, this laser has also been destroyed. Now we just have to blow up everything else.

Starting with this guy. Two middies standing side by side, this is better than last turn's, but still kinda meh. Especially with the arties still playing catchup.
And the less said about these two, the better. At least there's a road they can follow.

...Adder, you were supposed to have attacked me. To be fair, Middies are tough targets, but, uh... At least dent them. You have a middie you didn't move.

At least I can fire upon that middie with this arty.

The middie on the road moves over to take on this tank.

And the middie at the back comes in to finish the dented middie. Now we've advanced our defensive line and still have a middie to act!

The third middie deals with the other of Adder's. We do not want Adder's middies attacking us from 10 HP, although I worry that third one of his will get the chance.

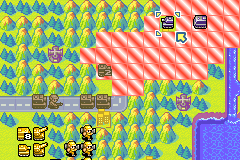
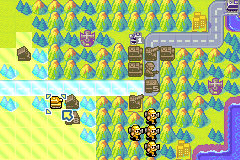
The wall we must push through looks something like this. I think we can overcome these odds.


Adder gets quotes before he unleashes his powers, I missed the screenshot on the first one. The giant splash screen that says "SUPER POWER!" only applies to SCOPs, though.

There are separate COP and SCOP themes for both sides. On another note, Adder's SCOP has a different name depending on whether you're playing the American or European version- it's Sidewinder in NA and Snakebite here.

...You call that snakebite? I've been in more danger from snakebites in my own house!
...Wait, I'm Australian, that's not actually much of an expression.

The arty takes out this guy. We need to pull off an offensive push, and the best way to do that is to open a hole with an indirect unit and let the middies fly free.


Enemy artillery are scary. Well, for normal armies. Kanbei isn't that scared, but they are the enemy units that can do the most damage to those middies.


I acknowledge this is ridiculous, but chipping the paint could come in handy. Consider that this middie technically did one damage to a mech with no defence. Now pit it against something with armour. A 2HP middie is much less scary than a 10HP one.


Although I notice a great dearth of positions in which to place the rest of my army.
This artillery decides the safest place on the map while still posing an actual threat is here. To be fair, it is surrounded on all three sides by Kanbei middies here, so it will only take one attack.

We're also Kanbei, so these guys are fairly sturdy even with these strange positions.


For everyone who's noticed Adder has used two powers and we haven't used one, this is legitimately the first time we've started a turn with Samurai Spirit charged. Adder's powers don't charge faster, but the losing army's does, and we have delivered a most thorough thrashing with little damage taken in return (Black Hole structure damage doesn't charge our powers).

Kanbei will show you the way of the samurai!
(Since we won't get the chance to use Morale Boost, this would be the theme if we did.)

Those rockets have to die at some point, and down a middie goes to deal with them. Yes, it is currently in range of them both from here.
It's time for the rockets to shoot at something that isn't a Black Hole structure!
Yep. Yellow Comet's rocket trucks are the most adorable unit in the game. Just look at those things. Now keep in mind that Kanbei's units are the most overpowered in the game. No wonder he's still using technology drastically outdated compared to that of the other armies- who needs to tech up when we're still mulching everybody?

Even the mechs hit above their weight class.

Sayonara, middie. In AWDS, combat where a unit destroyed a unit way above its weight class displayed the message "INCREDIBLE!". There's no actual reason to do it in this game (in fact, it's actually penalised in Days of Ruin), but it's always satisfying as hell.

The artillery doesn't actually have all that much to shoot at, so might as well pay attention to the mission objective and deal with these guys. Most of our army is going to be tied up here, which is why dealing with the rockets is its own thing.

...OK, apparently the infantry dealing with this tank didn't pan out.

Now this is a bit of a tricky thing- it's worth mentioning that terrain defence also scales based on HP. That's why this Middie can overkill the damaged mech but not the full HP one. I damage the full HP one, since a damaged unit can't capture.

The arty at the back here draws the short straw and deals with the 1HP tank. I need it gone so I can move over its tile, but nothing else nearby really wants to sacrifice its turn to deal with it. That's why I wanted the 5HP Inf doing the job.

I feel like the Luck system was designed for exactly this situation. As rare as I've found it, honestly.


I'm sure you will. Equally as I am sure you will not be succeeding in your endeavour today.


Samurai Spirit says hi. Thank you for not attacking the unit assigned to dealing with you.
Although that guy doesn't seem all that fussed either.
I know they're infantry, but it's an arty on a road. At least scuff the paint job!

...OK, they're on forests and the middie isn't at full health, but I was hoping this would be better. I'm going to need backup.

This mech will do.

This tank needs to move out of the square it started on more than it needs to make this attack. Although the position is helpful.
I will admit, though, I don't see this mech contributing now that an APC has ferried it up.
Get off my property!


Same to you two!

And the less said about this guy, the better. I think, despite the freeze frame, this was a oneshot.

Almost. Ah well, everyone else can go south now.

Both rockets fire on us rather than retreat.

And we've dented this guy in the back.

Doesn't seem like we can secure the kill this turn, though. Maybe if this tank had chosen to wander more south than it did, but then it'd worry about taking the rocket fire.

And we're done!
A rocket presents the most tempting target of all.

It is not necessary in any way to recapture these cities, but it was the right thing to do.

And Kanbei loads some weary units in them to resupply. Refuelling is free, healing costs money relative to the cost of the unit. Although because of how this map works, money is in no small supply- you get 1000G per property per day and Kanbei has no way to spend it other than through healing on cities.

Yep, that's about what I was hoping for.


I didn't play with the animations on, because you can't actually have them turned on without all units moving around at a ridiculously slow speed, but it would be a shame if I didn't show AW's adorable capturing animation. A footsoldier jumps up and down on an image of a city, squishes it, and once it reaches zero, it springs back up in a new colour. No matter what animation settings you're playing on, though, this animation always plays when a HQ property is being captured. It's the equivalent of declaring "check" in chess.

There's only one way for this map to be finished, though, and that is with a middie.


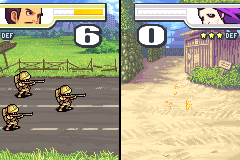
Flak is also observant enough to notice what defeat looks like. Although it's kinda sad when your standards consider this a vote for his intelligence.

This is the only match where you are required to fight Adder with Kanbei in the Campaign. He does fight Sonja and Sensei in other missions and there is a mission where you can choose a Yellow Comet CO to oppose him you can play before this one, but this is really supposed to be his matchup on Kanbei.

Flak has noticed that this trap has not succeeded and they've lost some (presumably expensive) material. Black Hole does have a resource supply line in the narrative.


It's also a fairly massive one, and the Black Hole army is considered to have a blank check as far as producing and mass-producing intimidating weapons goes. And the evil genius in charge of actually inventing the machines is a madwoman who favours "more explosives" in her blueprints.

Adder has to reconsider his options now.


He says this, but depending on what order you complete the missions in, he either has a false surrender mission or his final one next.


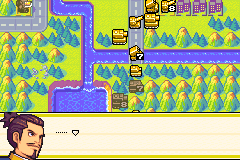
Good question. The way it looks to me, three of them (well, five, two are off-screen) are still black. It'd be nice if they showed off them turning yellow, but I think that's beyond the scope of the engine.


And with that, Sonja is witness to the results of their deeds first-hand.
One can make a lot of conclusions about this ellipsis, but I think the idea is that Kanbei, too, is bearing the weight of what it means to be receiving that message. He doesn't seem smart enough for a "told you so".

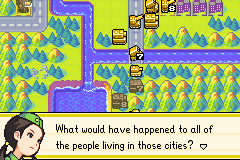
Sonja has reconsidered the position she started this mission on.

And Kanbei gets his one moment to say something actually intelligent.

He knows full well what he's fighting for, and he will put everything on the line to fight for those things. The only thing Sonja is doing here is telling him what the best way to accomplish those goals is.

There's a reason Sonja hasn't become Empress yet, as tempting as that might be sometimes.
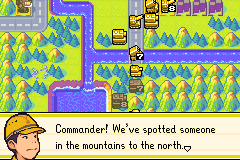

This is a generic Yellow Comet soldier. In saying this, there's a bit of an open question about Advance Wars maps- where, exactly, are the COs standing while all this is going down? Days of Ruin let you put COs on the battlefield, and Kanbei would no doubt be standing on top of one of the middies if that was an option here, but other than that... where is this conversation happening?
...Also, "mountains to the north"? Either this map is not oriented such that the north of the map is the top, or the enemy COs were standing closer to us than the main body of their army. Admittedly, it's Adder and Flak- if any two COs would do something that dumb, it would be them.

Kanbei is all in on actually punishing the people who brought danger to his people.

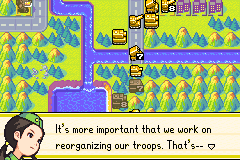
Sonja points out that they've got too much ground for that to work out.
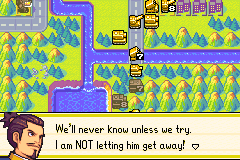
Kanbei just refuses to understand his limits. Considering how overpowered of a CO he is, not an unreasonable position to stand in, but certainly a very frustrating one.

How can a man who fights so strongly for his people be completely and utterly foolish five seconds later?

Every map gives you a grade based on your performance on these three qualities:
- Speed is how quickly you completed a map compared to a target time, set individually for each map. I'm told this map has a time limit of 14 Days.
- Power requires you to destroy 10% of the enemy's army in a single turn to score 100. In predeployed, that's relatively easy (Adder has 24 units and will never make more, so I only needed to destroy 3 enemies in one turn.)
- Technique requires you to lose no more than 20% of your units to score 100. This is much harder in predeployed- you can totally deploy a bunch of cheap infantry to shore up your numbers for a good technique score otherwise. Kanbei starts with 18 units, so you can only afford to lose 3- keep in mind that Joining doesn't count as losing a unit.

Pretty much. Even in a map where he cares about his weaknesses, the best way to deal with an enemy Kanbei is either to out-manoeuvre him (most maps that make you fight a Kanbei in AW usually give you some method of doing that) or rush him while he's still building his forces. Characters who can mass-produce units can overwhelm him with sheer numbers, but this isn't exactly easy.

At the end of a mission, you can see your final time (not that it matters beyond what it does for your Speed score) and the points you earned from your ranking are added to a "bank" of points. These points can be exchanged for prizes in a shop- more non-story maps to play on in War Room and multiplayer, certain unlockable COs, and CO custom colours, mainly.
And that is what an Advance Wars 2 mission looks like. There's very little insight into how each mission helps you strategically, but every one of the twelve main COs gets two spotlight missions each and they are all fairly interesting windows into what kind of people they are and how they react to the situations they find themselves in. Honourable mentions go to Sea For All with Andy, Tanks!!! with Grit, Toy Box with Olaf, A Mirror Darkly with Sonja, Sea Fortress with Eagle and Rain of Fire with Jess. AW2 is sandwiched between the "still finding its feet" AW1 and the "this is more of a comedy than a drama" AWDS, but it tells a number of individually compelling stories in the middle of its not entirely serious/involved macro story about a semi-alien invasion.
Duty & Honour stands out particularly because when we get a war game, we are often told to choose between an idealistic "we must save as many lives as possible" position and a pragmatic "winning this war as fast as possible is the best we can do" position, with the latter usually coming from a very cold person in other matters as well (consider Soren and Hubert, for example). Kanbei's argument is unusual in that it actually succeeds at winning the argument for the "save lives" position with reason as well as emotion. The most important part of being in control of a territory is what that territory adds to the world, and 99 times out of 100, you need the people that live there in order for that to mean anything. Sure, Sonja's approach will win Yellow Comet the war, but at the cost of the people that live there? What's the point? We fight for Yellow Comet for the benefit of the people therein, and our objectives should be to save those people first, and then we can consider how to properly position our armies to actually counter Black Hole and win the war. It's important to remember to define what "victory" means, and to not tunnel vision onto achieving victory at the cost of the very thing you set out to fight for.
No comments:
Post a Comment